


Requirements
- UC11-T1 sensor
- UG65 LoRaWAN® Gateway
- The Things Network Account
- Ubidots Account
Step by Step
- TTN Device Registration
- Uplink message management
- a. Custom payload setup b. Ubidots Platform integration setup
- Data visualization / Dashboard Creation
- Summary
- Refer to the following guide for detailed information: How to Add LoRaWAN® gateway to TTN
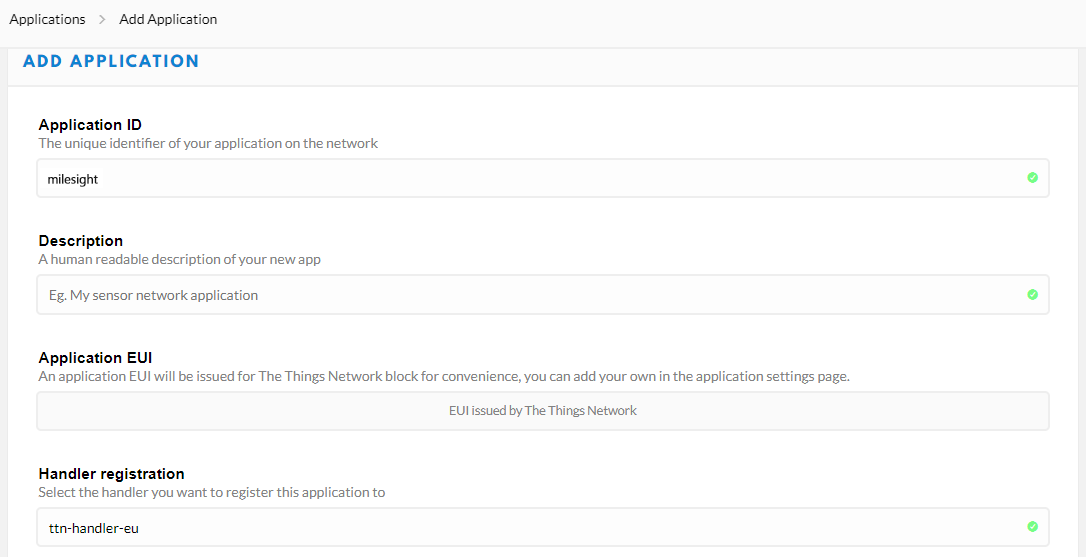
- Application ID: The unique identifier of your application on the network.
- Description (optional): a human readable description.
- Handler registration: handler where you want to register the application.
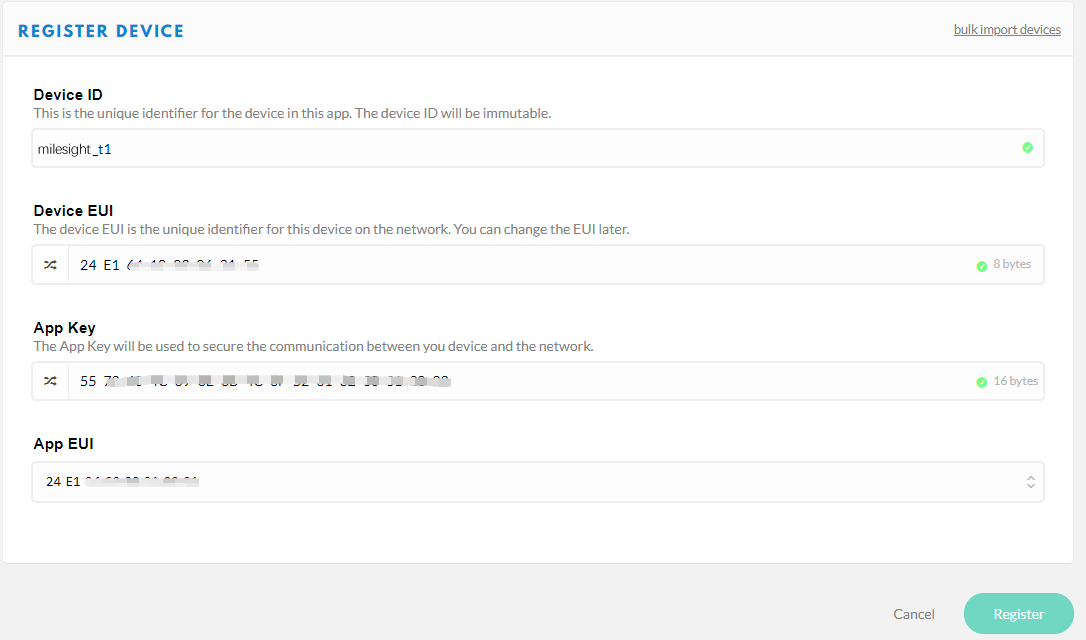
 3. Into the application previously created register a new device. To do this, refer to the Device tab of the application. Then click “Register Device” to register a UC11-T1.
In the following page, assign the parameters below:
3. Into the application previously created register a new device. To do this, refer to the Device tab of the application. Then click “Register Device” to register a UC11-T1.
In the following page, assign the parameters below:
- Device ID: the unique identifier for the device in the application. The device ID will be immutable.
- Device EUI: the unique identifier for the device on the network.
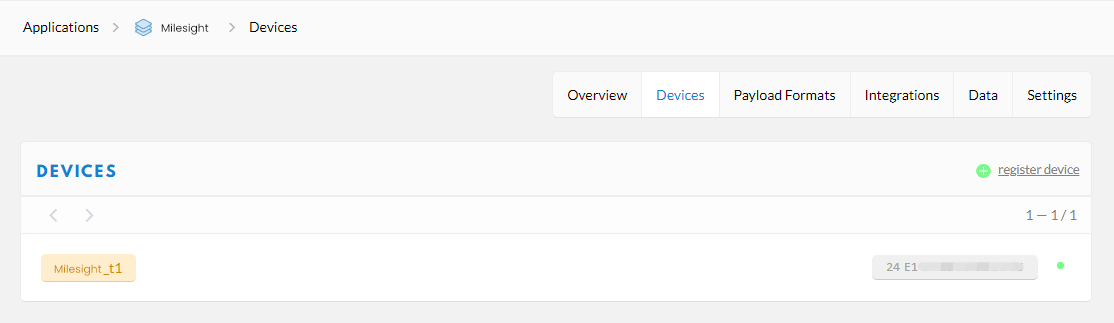
 Once the device’s registration is done, you will be redirected to the device overview. At this point, the device’s status is “never seen” because is waiting for its first message.
 Uplink Messages Management
a. Custom Payload
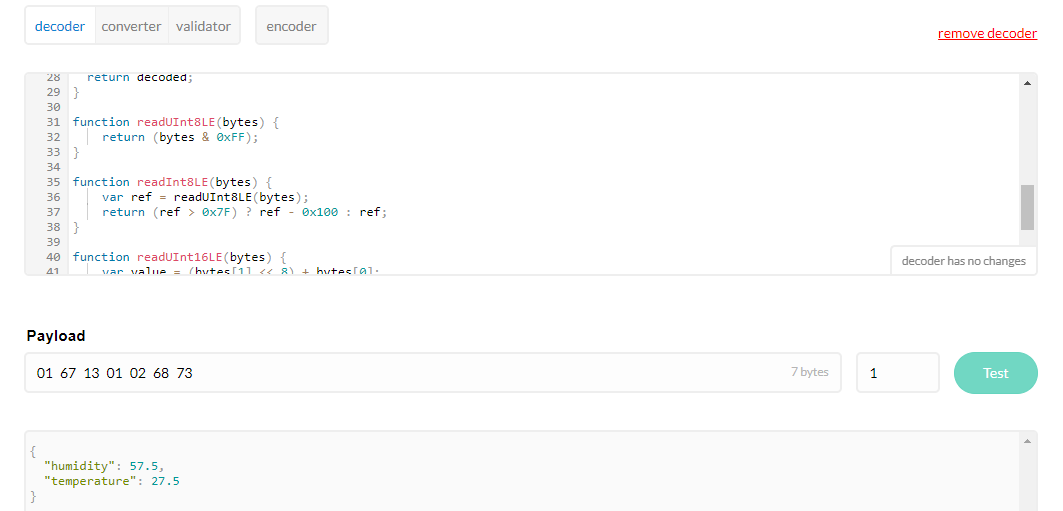
1. Go to Application overview, and refer to “Payload Formats” tab. Then, assign the following code into the decoder section to format the payload in a JSON object, which is the one allowed by Ubidots Platform.
Uplink Messages Management
a. Custom Payload
1. Go to Application overview, and refer to “Payload Formats” tab. Then, assign the following code into the decoder section to format the payload in a JSON object, which is the one allowed by Ubidots Platform.
 // T1: Payload Decoder
function Decoder(bytes, port) {
var decoded={};
for(i=0;i< bytes.length;){
//BATTERY
if(bytes[i]==0x03){
decoded.battery=bytes[i+2];
i+=3;
continue;
}
//TEMPERATURE
if(bytes[i]==0x01){
decoded.temperature=(readInt16LE(bytes.slice(i+2, i+4)))/10;
i+=4;
continue;
}
//HUMIDITY
if(bytes[i]==0x02){
decoded.humidity=readUInt8LE(bytes[i+2]) / 2;
i+=3;
continue;
}
}
return decoded;
}
function readUInt8LE(bytes) {
return (bytes & 0xFF);
}
function readInt8LE(bytes) {
var ref = readUInt8LE(bytes);
return (ref > 0x7F) ? ref - 0x100 : ref;
}
function readUInt16LE(bytes) {
var value = (bytes[1] << 8) + bytes[0];
return (value & 0xFFFF);
}
function readInt16LE(bytes) {
var ref = readUInt16LE(bytes);
return (ref > 0x7FFF) ? ref - 0x10000 : ref;
}
2. After placing the code, you can verify it by assigning the following Payload. Then, click “test” to show the JSON output.
Example: 01 67 13 01 02 68 73
// T1: Payload Decoder
function Decoder(bytes, port) {
var decoded={};
for(i=0;i< bytes.length;){
//BATTERY
if(bytes[i]==0x03){
decoded.battery=bytes[i+2];
i+=3;
continue;
}
//TEMPERATURE
if(bytes[i]==0x01){
decoded.temperature=(readInt16LE(bytes.slice(i+2, i+4)))/10;
i+=4;
continue;
}
//HUMIDITY
if(bytes[i]==0x02){
decoded.humidity=readUInt8LE(bytes[i+2]) / 2;
i+=3;
continue;
}
}
return decoded;
}
function readUInt8LE(bytes) {
return (bytes & 0xFF);
}
function readInt8LE(bytes) {
var ref = readUInt8LE(bytes);
return (ref > 0x7F) ? ref - 0x100 : ref;
}
function readUInt16LE(bytes) {
var value = (bytes[1] << 8) + bytes[0];
return (value & 0xFFFF);
}
function readInt16LE(bytes) {
var ref = readUInt16LE(bytes);
return (ref > 0x7FFF) ? ref - 0x10000 : ref;
}
2. After placing the code, you can verify it by assigning the following Payload. Then, click “test” to show the JSON output.
Example: 01 67 13 01 02 68 73
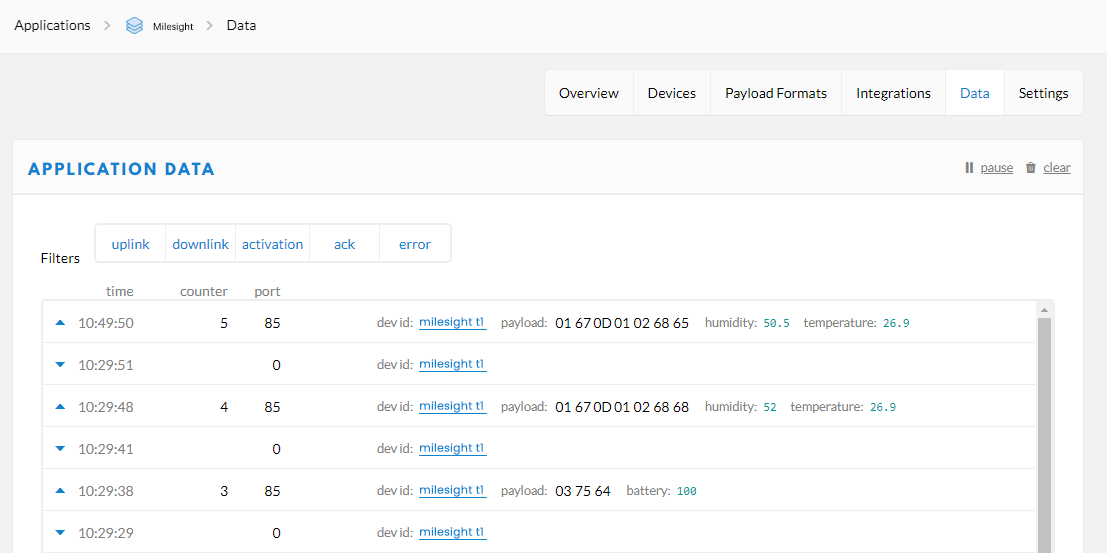
 3. To save the changes, click “Save Payload Functions”.
4. At this point, if you refer to the data section you will notice how the data is being automatically decoded after saving the decoder function.
3. To save the changes, click “Save Payload Functions”.
4. At this point, if you refer to the data section you will notice how the data is being automatically decoded after saving the decoder function.
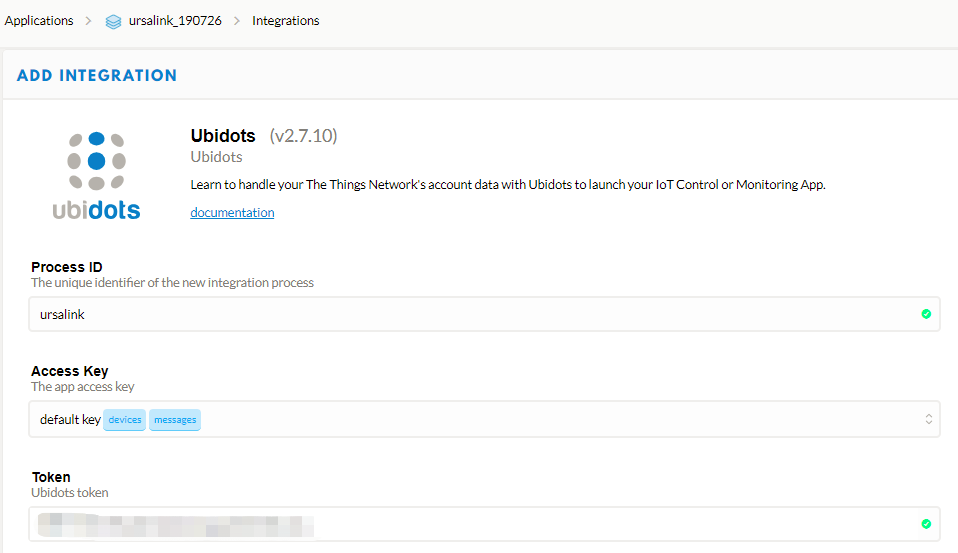
 b. Ubidots Platform Integration Setup
1. Go to the “Integration” tab to add a new integration. To create a new integration, just press “add integration”.
2. Then, select Ubidots Platform as integration:
b. Ubidots Platform Integration Setup
1. Go to the “Integration” tab to add a new integration. To create a new integration, just press “add integration”.
2. Then, select Ubidots Platform as integration:
- Process ID: The unique identifier desired for the integration process.
- Access Key: The app access key.
- Token: Your Ubidots Platform account Token. (Refer to this guide to know where to find it.)
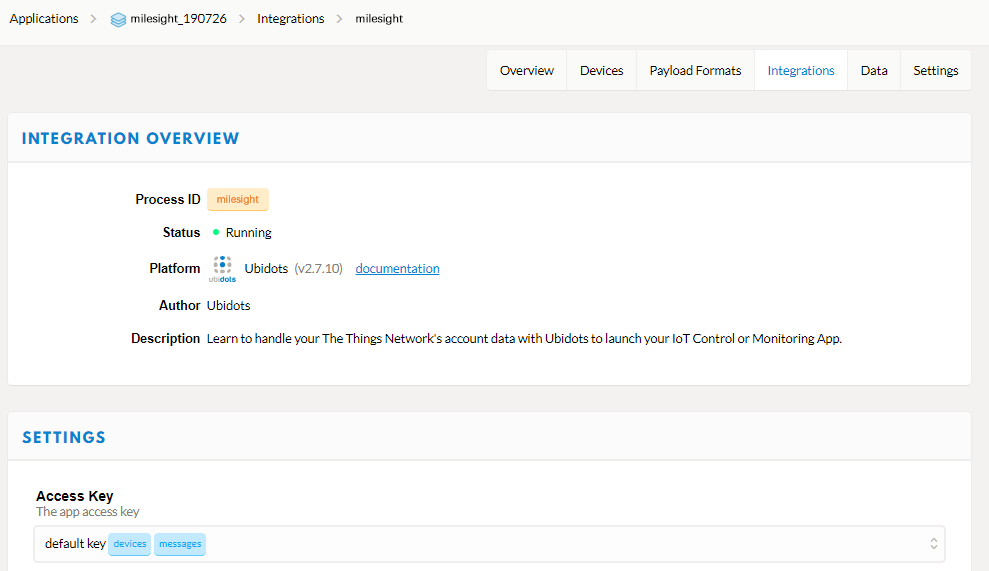
 4. To finish, select “Add integration”. You’ll be redirected to the integration overview:
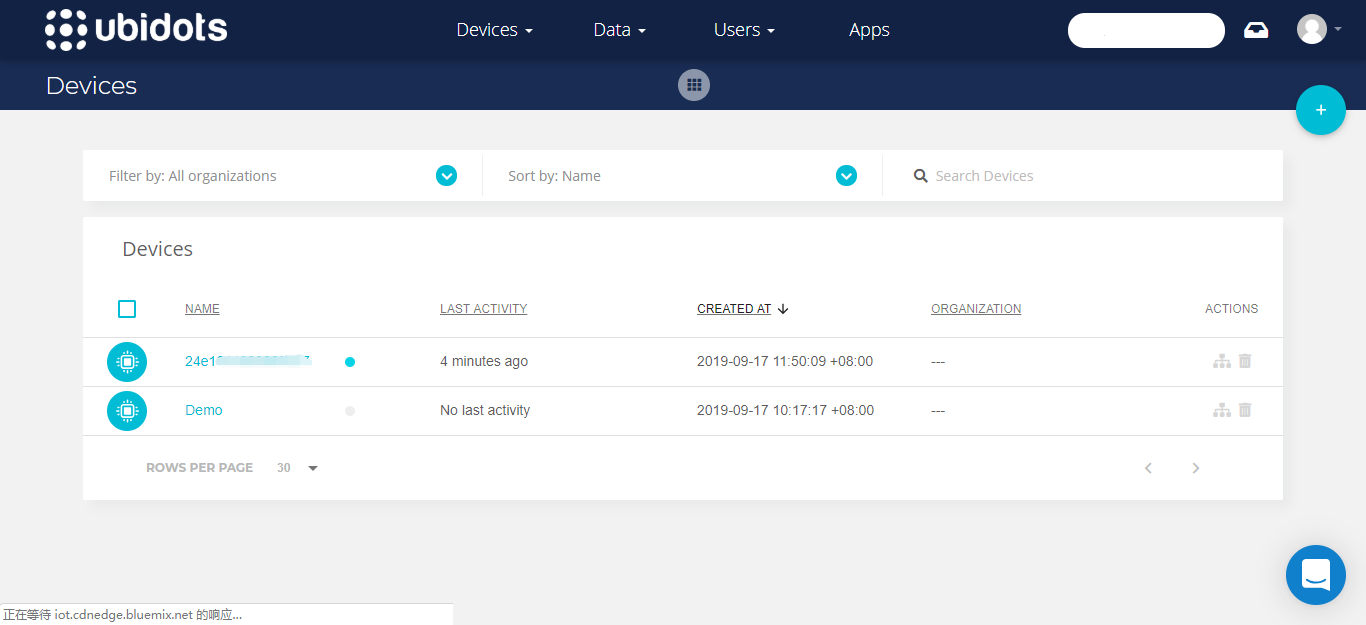
 5. Once a new value is received in TTN from the device, a new device will be automatically created into your Ubidots account. Go to the device section of your Ubidots Platform account (Devices > Devices) to verify the new device created identified with the device EUI.
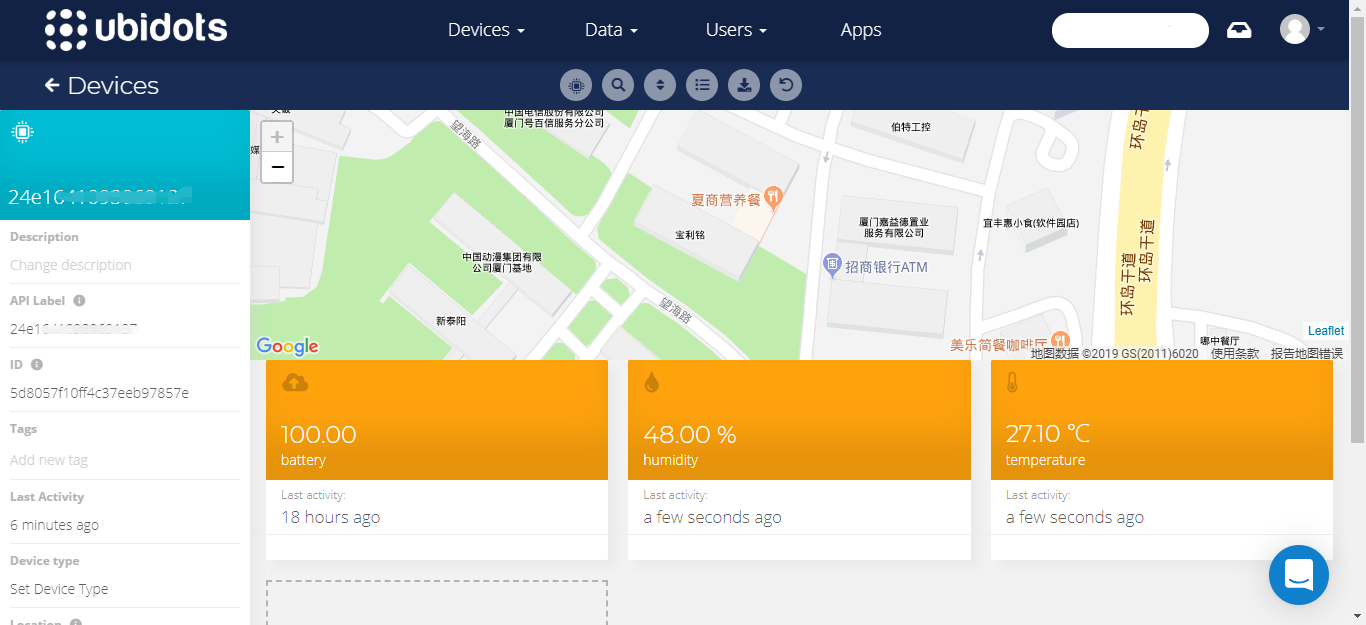
 6. Select the device created to verify all the variables received:
 7. [OPTIONAL - PRO TIP]: If you are using multiple devices to transmit data, we recommend editing the device name, assigning a friendly and readable name for easier identification:
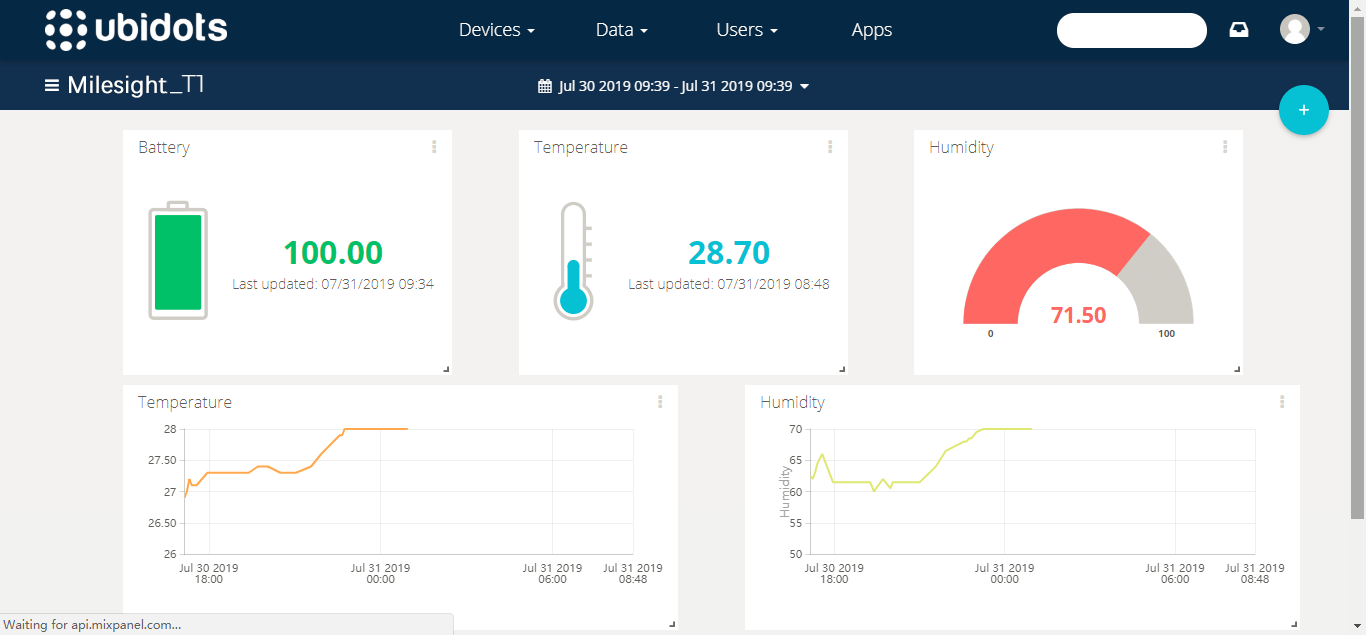
Data Visualization
Now it’s time to build your own dashboard to start monitoring the data sensed by Milesight devices.
1. Go to the Dashboard (Data -> Dashboard) section of your Ubidots account.
2. Select the plus (+) icon located a the right-upper side of the page. Then select the widget types desired to display your data.
7. [OPTIONAL - PRO TIP]: If you are using multiple devices to transmit data, we recommend editing the device name, assigning a friendly and readable name for easier identification:
Data Visualization
Now it’s time to build your own dashboard to start monitoring the data sensed by Milesight devices.
1. Go to the Dashboard (Data -> Dashboard) section of your Ubidots account.
2. Select the plus (+) icon located a the right-upper side of the page. Then select the widget types desired to display your data.
 Summary
LPWAN applications are having a huge impact on the IoT ecosystem, even more if the integrations required have a rapid set-up, like we just did with Milesight devices and Ubidots.
Summary
LPWAN applications are having a huge impact on the IoT ecosystem, even more if the integrations required have a rapid set-up, like we just did with Milesight devices and Ubidots.


